

A driveway culvert is simply a pipe buried under your driveway that lets a ditch, stream, or runoff channel keep flowing instead of pooling against the roadbed. The practical rule of thumb: never go smaller than a minimum diameter typically set by local regulations, commonly around a dozen inches, and choose a larger diameter pipe if the site experiences heavy debris, wooded runoff, or persistent standing water after storms. Before you buy anything, walk the site, measure what drains toward that crossing, and call your local public works office about permits.
TL;DR:
- Using a pipe at least 12 inches in diameter is standard, but increasing to 18 inches is advised for heavy debris or larger flow.
- HDPE pipes are easiest to handle and resistant to corrosion, but they require proper bedding and support to prevent deformation under load.
- Installing the culvert with shaped bedding, proper backfill lifts, and attention to minimum cover ensures longer-lasting durability.
- Permits are typically needed if the culvert crosses streams, wetlands, or ditches, with costs varying based on site specifics and materials.
- Proper maintenance includes inspecting for sediment buildup and deformation after storms, with early issues often indicating poor installation rather than pipe failure.
Table of Contents
- Choosing the Right Culvert Material for Your Driveway
- What Size Culvert Do You Need for a Driveway?
- How to Install a Driveway Culvert Correctly
- Permits, Costs, and Where to Buy a Culvert
- Maintaining Your Culvert and Spotting Trouble Early
- Where This Guidance Comes From
- DIY or Hire a Pro: A Quick Gut Check
- A Local Option if You'd Rather Not Dig It Yourself
- Sources
- FAQ
- The Part Most Guides Skip
Choosing the Right Culvert Material for Your Driveway
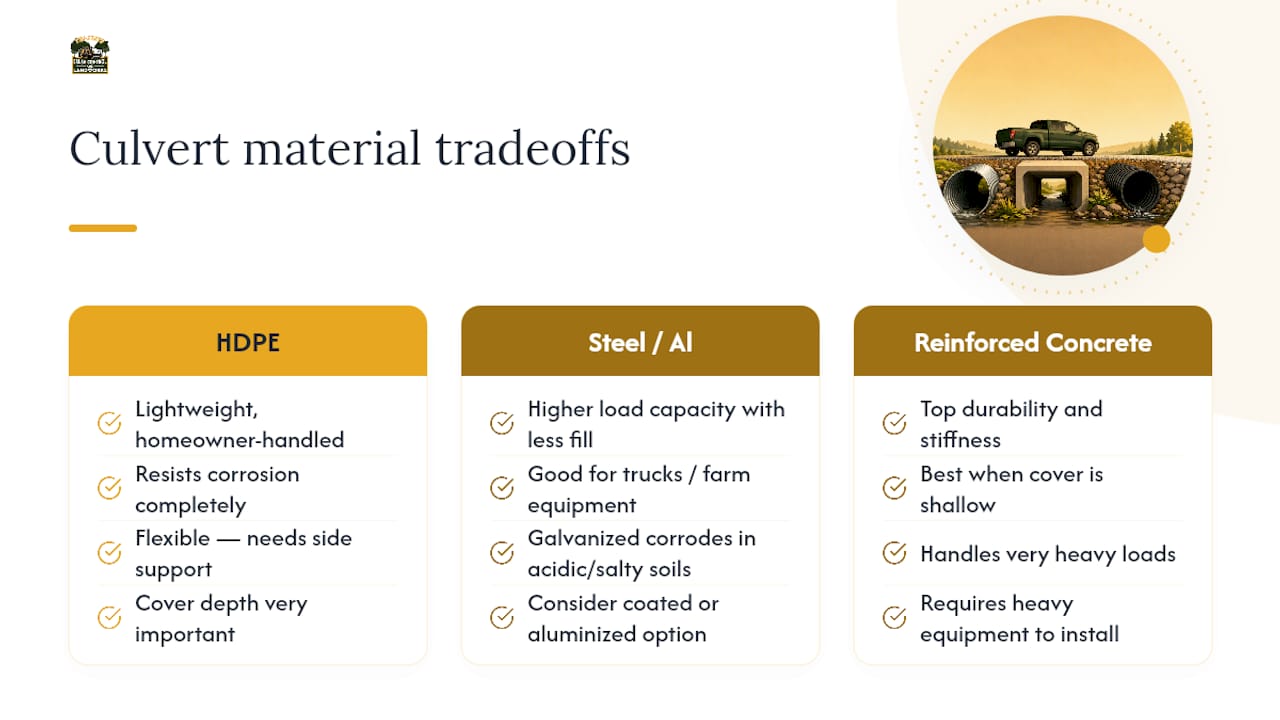
Material choice comes down to three questions: how much weight crosses it, what your soil does to metal over time, and how much you want to spend. Getting this wrong is the second most common reason driveway culverts fail early, right behind poor bedding.
HDPE corrugated pipe is the default choice for most homeowners. It's light enough for one or two people to muscle into a trench, resists corrosion completely, and connects with simple couplers. The tradeoff is flexibility. It needs proper side support to hold its shape under a loaded pickup or a delivery truck, so cover depth matters more here than with rigid materials.
Corrugated steel or aluminum pipe carries heavier loads with less fill on top, which makes it a better fit for driveways that see trucks or farm equipment regularly. Acidic or high-salt soils eat through galvanized steel faster than manufacturers like to admit, so ask about coated or aluminized options if your soil test comes back on the aggressive side.
Reinforced concrete and arch or box sections sit at the top end of both cost and durability. They're the right call when cover depth is shallow, loads are heavy, or local code requires rigid pipe for the site. Installation typically needs equipment beyond what a homeowner has in the garage.
Shape affects performance too. Round pipe handles high flow efficiently in a small footprint. Arch and box shapes spread flow wider and work well where you have plenty of width but limited depth to bury a pipe, which matters when your existing grade barely clears the road.
What Size Culvert Do You Need for a Driveway?
Sizing a culvert isn't guesswork, but it also isn't a formula most homeowners need to run. Start with the minimums, then adjust upward based on what actually drains toward that crossing.
WSDOT's hydraulics manual defines minimum diameter standards for private driveway culverts, along with minimum cover and end treatment requirements. That 12-inch figure shows up across most county and state driveway guidance as the practical floor. Anywhere you expect leaves, gravel, branches, or heavier flow, bump that up to 18 inches. The extra 6 inches costs relatively little and buys a lot of insurance against clogging.
To estimate your catchment, walk the drainage path uphill from the crossing and note everything that sends water toward it: roof down spouts, a neighbor's field, a paved area, or a natural swale. Impervious surfaces like asphalt or packed gravel shed water fast, so a small catchment with a lot of pavement can move more water than a much larger wooded lot.
A single larger pipe often outperforms two smaller ones. USDA Forest Service guidance recommends choosing one larger barrel over multiple small pipes wherever channel debris is a concern, since debris bridges across multiple openings far more easily than it clogs a single wide one.
A few sizing habits worth adopting:
- When your catchment estimate falls between two pipe sizes, round up rather than down.
- Count the whole drainage area feeding the crossing, not just the width of your driveway.
- Favor one 18 inch pipe over two 12 inch pipes on sites with leaf litter, gravel wash, or agricultural debris.
- Recheck your estimate after any nearby construction, since new pavement or grading changes runoff patterns fast.
How to Install a Driveway Culvert Correctly
Sizing gets the attention, but installation quality is what actually determines whether your culvert lasts 5 years or 30. FHWA's drainage guidance treats culverts as both hydraulic conduits and load-bearing structures, and that second part is where most DIY installs go wrong.
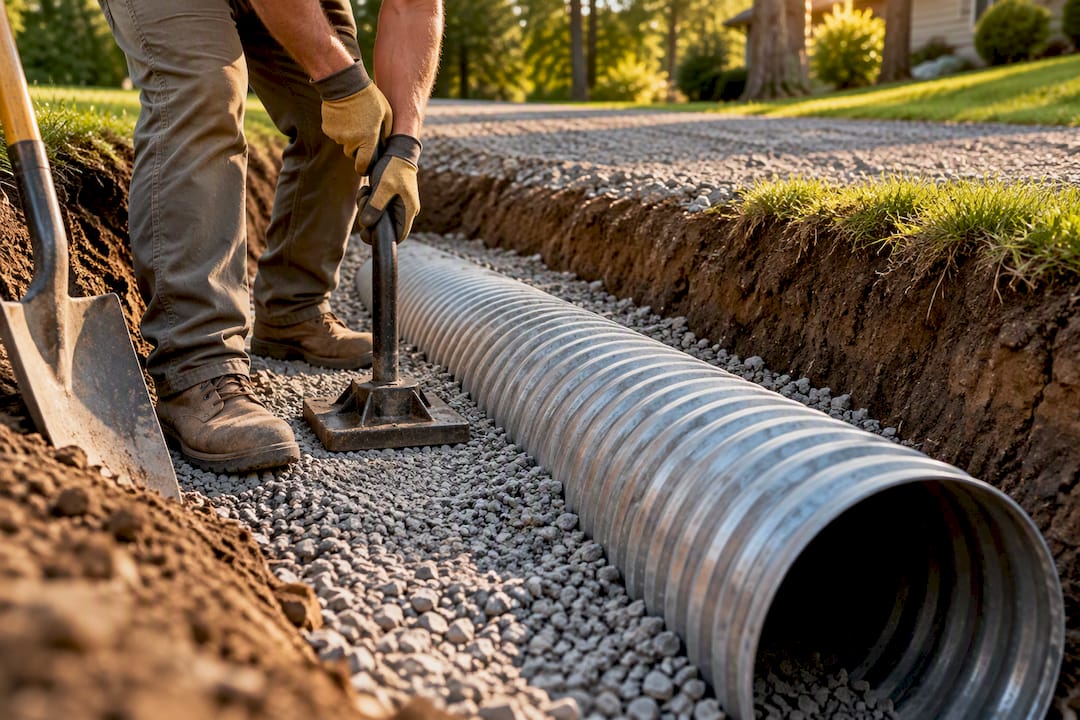
- Shape the bedding first. Excavate below the invert and shape a bed of granular material to cradle the pipe's curve. For some rigid pipe types, leave the center third of the bedding uncompacted so the pipe seats naturally rather than riding on a hard spot.
- Backfill in lifts, not all at once. Place sidefill material in roughly 6-inch lifts and compact each one before adding the next. Loose excavated soil dumped back around the haunches is one of the fastest routes to a crushed or ovaled pipe.
- Respect minimum cover. Every material has a minimum depth of fill required over the top of the pipe before vehicles can drive over it safely, and a maximum fill height beyond which the pipe needs a different class or wall thickness. Check the manufacturer's chart for your exact pipe.
- Add end protection. Flared end sections, headwalls, and riprap at the outlet all reduce erosion and slow the water enough that it doesn't undercut the pipe over time. A trash rack at the inlet catches branches and debris before they reach the barrel.
- Keep it straight. Align the culvert with the natural channel and avoid bends. Every bend is a spot where debris catches and sediment settles.
Pro Tip: Compact the first lift of sidefill by hand or with a plate compactor before you ever get near the pipe with a loaded wheelbarrow. Crushing a pipe on day one is far more common than most people expect, and it always happens before the driveway surface even goes down.
Prinsco's installation guide puts it bluntly: an oversized pipe with poor bedding and compaction will still fail. Size matters, but installation quality is what actually protects your investment.
Permits, Costs, and Where to Buy a Culvert
Most jurisdictions require a permit when a driveway culvert crosses a mapped stream, ditch, or wetland, even for a modest residential project. Skip this step and you risk a stop-work order or a costly redo later.
- Check with your county public works or road department first. Many maintain a specific driveway culvert permit process with minimum size and setback rules baked in.
- If the crossing touches a stream or wetland, expect additional state environmental review on top of the local permit.
- Material-only costs for common HDPE pipe sizes generally depend on diameter and length, with prices varying accordingly, with steel and concrete priced higher; labor, excavation, and end treatments like riprap or headwalls add to the total.
- Big-box and farm supply retailers like Tractor Supply stock common HDPE sizes and basic accessories, while steel, concrete, and custom end treatments usually come from a specialty drainage supplier.
Maintaining Your Culvert and Spotting Trouble Early
A culvert that fails almost never fails without warning. Walk the inlet, barrel, and outlet after any significant storm and look for sediment buildup, vegetation growth, or visible deformation in the pipe walls.
- Standing water at the inlet after a storm usually means partial blockage, not undersizing.
- A sunken or dipping driveway surface over the pipe often signals settlement from poor compaction, not old age.
- Scouring or a widening gully at the outlet means the water is moving too fast for the ground to handle. Add riprap or a flared end section.
- A crushed or badly deformed barrel isn't a patch job. That section needs replacement.
Pro Tip: Keep a small trash rack or a few large rocks staged at the inlet in the fall. Fifteen minutes clearing leaves before a storm beats an afternoon digging out a washed-out driveway after one.
Where This Guidance Comes From
None of this is opinion pulled from thin air. It reflects how state and federal agencies actually engineer these crossings.
- FHWA's construction and drainage review guidance treats bedding and compaction as structural design requirements, not optional finishing steps.
- WSDOT's hydraulics manual sets the 12-inch minimum diameter standard referenced throughout state and county driveway codes, along with cover and end-treatment specs.
- USDA Forest Service guidance pushes designers to size for debris and larger storm events, not just average flow, specifically to avoid repeat plugging in wooded or agricultural sites.
Local county drainage codes, like Kitsap County's stormwater rules, often layer additional minimums on top of state guidance, which is exactly why a permit call before you dig saves headaches later.
DIY or Hire a Pro: A Quick Gut Check
Small-diameter HDPE, light residential traffic, and easy trench access add up to a reasonable weekend DIY project. Stream crossings, deep fill, heavy truck traffic, or anything triggering a permit review call for a contractor with the right compaction equipment and experience reading a hydraulics chart. If you're unsure which category your site falls into, an on-site quote from a local contractor costs you nothing and settles the question fast.
A Local Option if You'd Rather Not Dig It Yourself
A local land clearing and gravel driveway contractor can offer a faster path than the DIY route just described, especially when your culvert project involves regrading, brush clearing along the ditch line, or a driveway surface that needs work anyway. Instead of renting a compactor and researching bedding specs on a Saturday, you get a crew that handles site prep and gravel driveway repair and installation in one visit, with instant pricing so you know the cost before anyone shows up.

If brush, honeysuckle, or overgrown vegetation is blocking access to the crossing or the ditch line, that's covered too through their land clearing and site prep services. Jobs get scoped and priced individually, with flexible financing options often available for larger projects, and the services can range from a single driveway culvert tie-in to a full lot regrade. Request a quote through the services page or check instant pricing to see where your project lands before committing to anything.
Sources
- Drainage Guidelines - Federal Highway Administration
- USDA Forest Service - Culvert use and installation guidance
- Prinsco culvert installation guide
- WSDOT Hydraulics Manual M 23-03, Chapter 8
FAQ
How much do driveway culverts cost?
Material costs vary by pipe type and diameter, with HDPE generally the least expensive option and concrete or steel running higher per foot. Total project cost depends heavily on excavation, end treatments like riprap or headwalls, and whether you hire installation labor. Tri-State Brush Control & Gravel provides instant pricing for driveway and site prep work through its services page, so current rates are available directly on the site.
Can you install a culvert yourself?
Yes, for straightforward sites with light residential traffic, good trench access, and no stream or wetland involved, a small-diameter HDPE culvert is a reasonable DIY project. Stream crossings, heavy truck traffic, deep fill, or anything requiring a permit are better handled by a contractor with compaction equipment and grading experience.
How much does a 20-foot culvert cost?
Total cost for a 20-foot section depends on diameter and material, since price scales per linear foot and jumps significantly between HDPE, steel, and concrete. Labor, bedding material, and end treatments like flared ends or riprap typically add more to the total than the pipe itself.
Do I need a permit for a driveway culvert?
Often, yes, especially if the crossing touches a mapped stream, ditch, or wetland, since many counties require a driveway culvert permit even for residential projects. Check with your local public works or county stormwater department before digging, as minimum size and setback rules vary by jurisdiction and some sites trigger additional state environmental review.
The Part Most Guides Skip
Every culvert guide obsesses over diameter, and the sizing math genuinely matters. But after looking at how these things actually fail in the field, the honest takeaway is that bedding and compaction cause more early failures than undersizing does. A pipe sized one size too small might run a little slower during a heavy storm. A pipe dropped into a loosely backfilled trench with no shaped bedding will ovalize, crack, or settle within a few seasons regardless of how perfectly you calculated the catchment area.
That's not the popular advice, because "measure your drainage area" is a more satisfying story than "compact your backfill in 6-inch lifts and don't rush it." But the agencies that actually engineer these crossings, from FHWA to WSDOT to the manufacturers writing installation guides, all circle back to the same structural basics. If you take one thing from this article, take this: buy a pipe that's slightly larger than your math says you need, then spend twice as long on the bedding and backfill as you planned to. That's where driveways actually fail, and it's the cheapest insurance you'll ever buy for a project buried under several tons of gravel.
— Yoshua